The OpenVPN setup consists of three steps: obtaining the configuration file, uploading it to the TP-Link router, and connecting devices to the VPN.
Getting the configuration
Get the .ovpn configuration file from your BlancVPN account. Click Install → choose the device → Another VPN client → go to setup guide → TP-Link → in the Location and protocol column choose OpenVPN and the desired location → download the .ovpn configuration file and copy your login and password.
Setting up the router
Open your browser and go to 192.168.0.1 or 192.168.1.1. Enter login and password for the router.
If you cannot log in, reset the router to factory settings using the instructions provided with the device or on the manufacturer's website.
Connecting to VPN
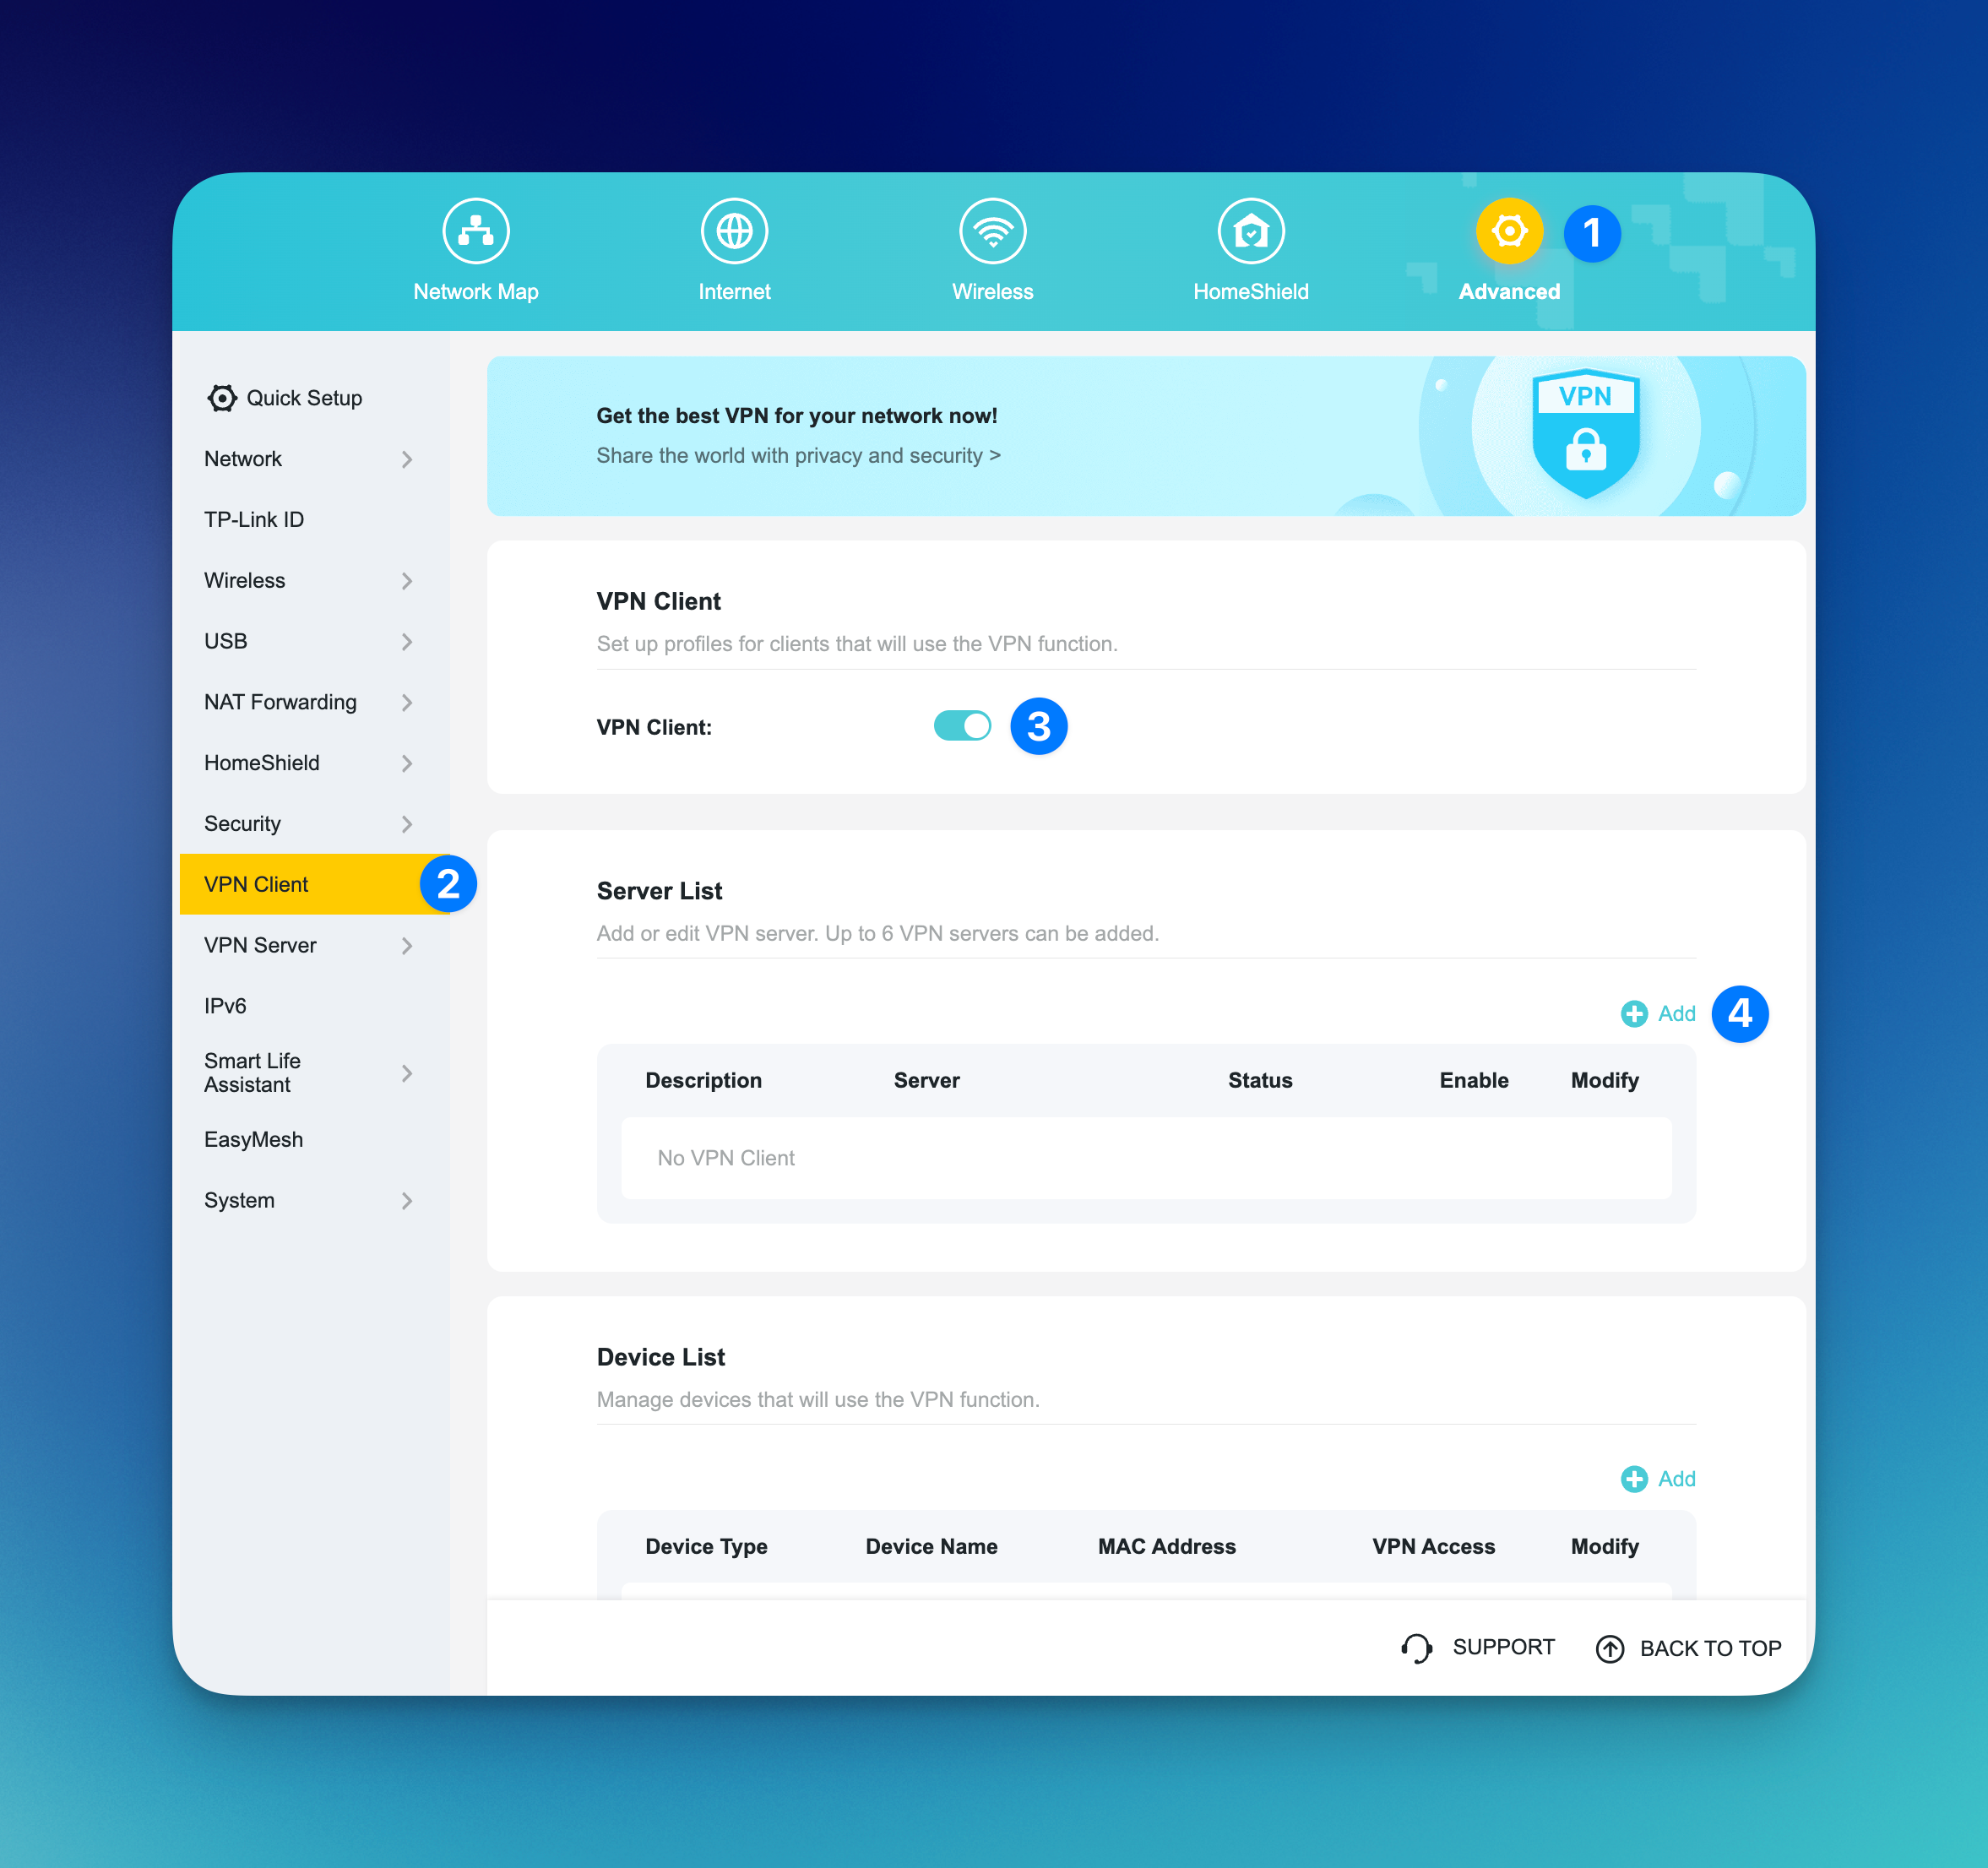
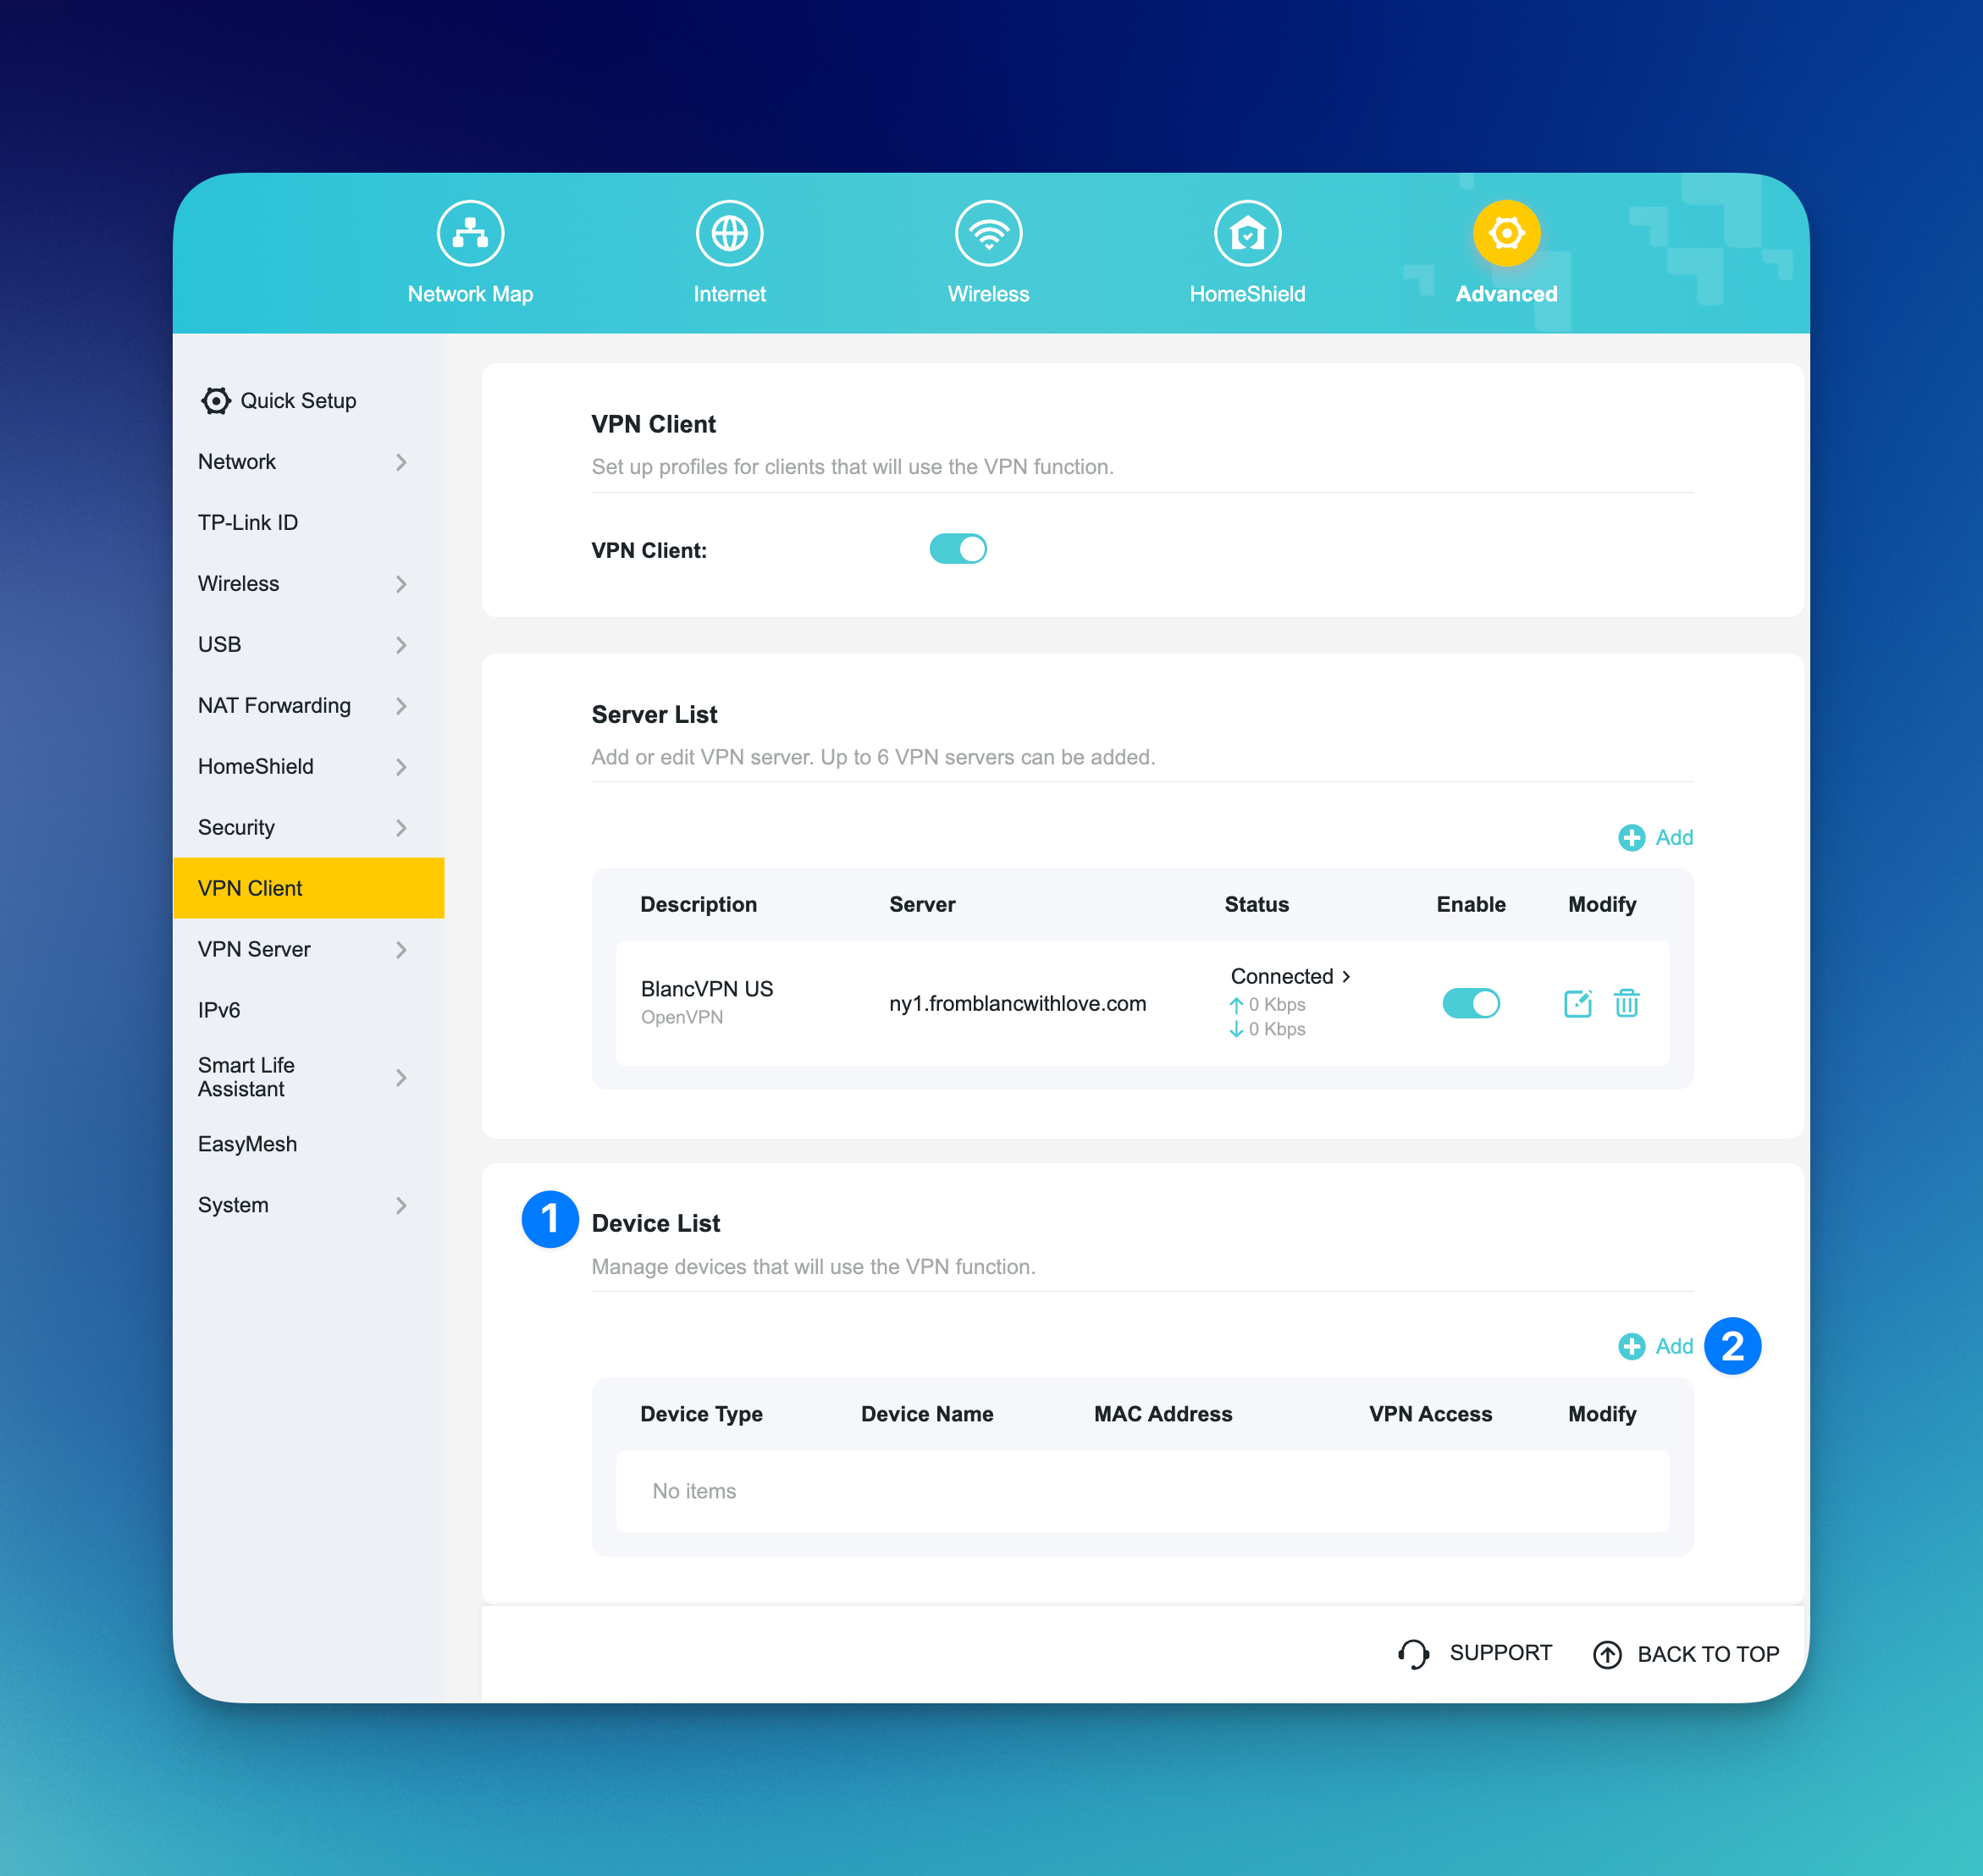
Open the Advanced tab in your router menu.
Select VPN Client. If this option is missing, your router does not support VPN.
Enable the VPN Client option and click Add → Manual adjustment.
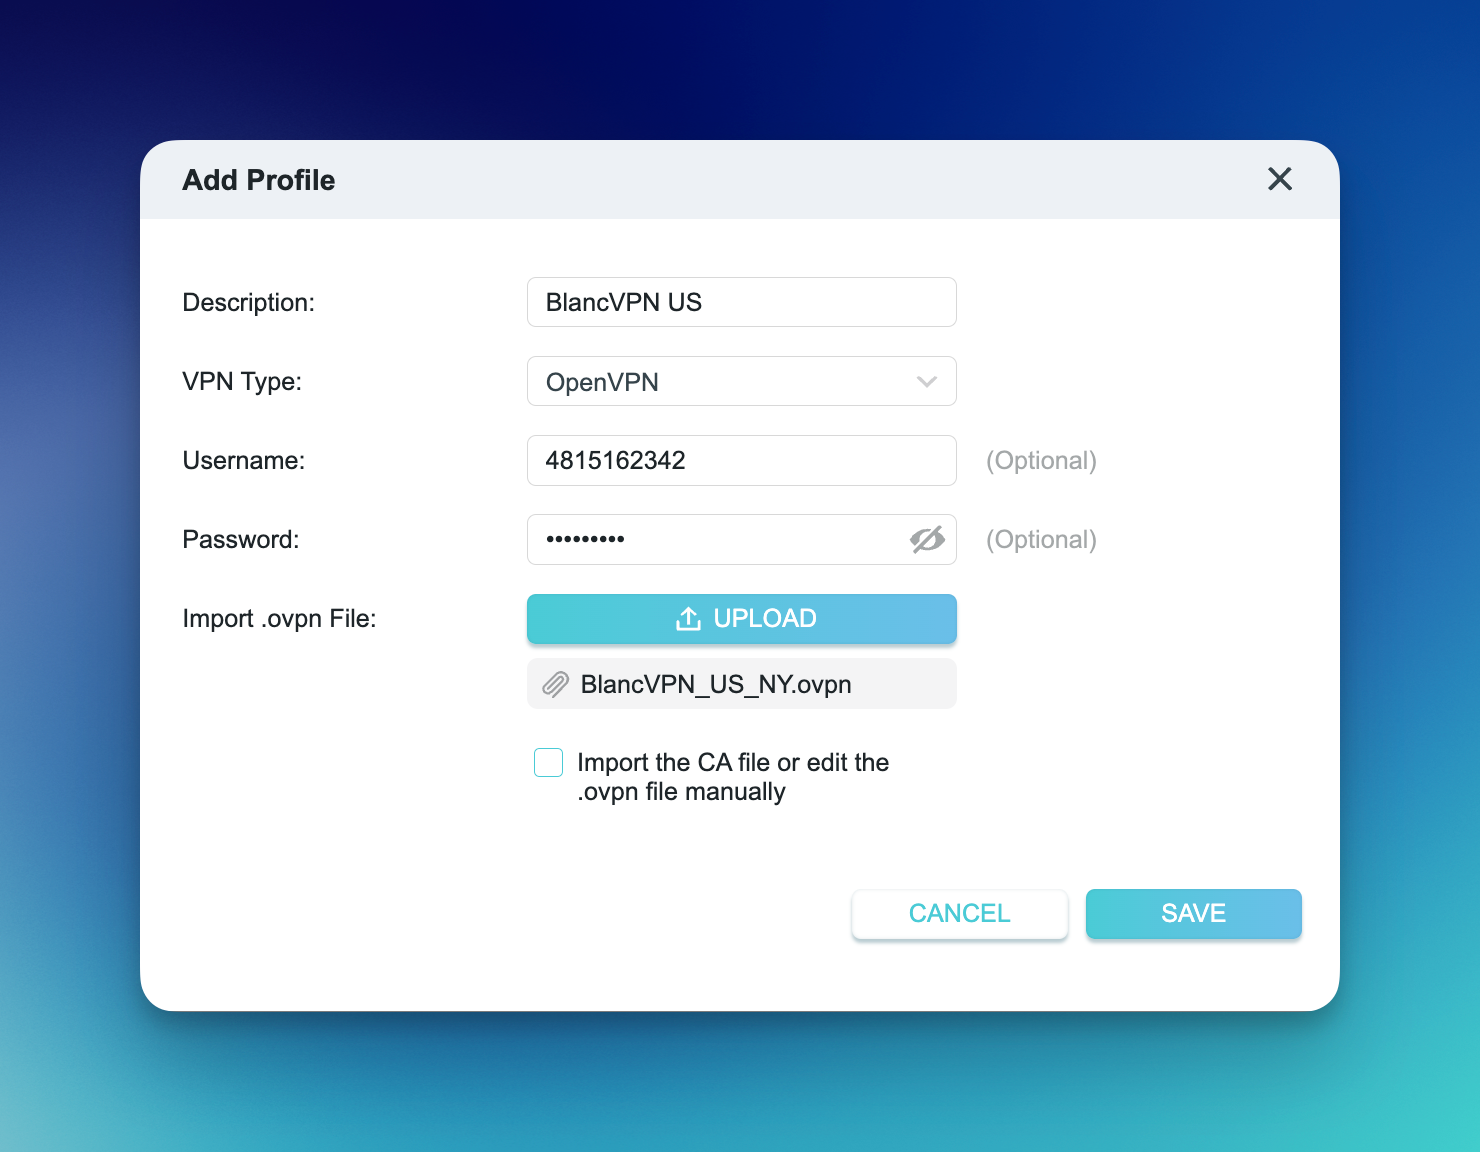
Fill in the details:
VPN Type: OpenVPN.
Username and Password: Use the credentials provided in your personal account.
Description: Add a note for reference, such as
BlancVPN.
Import the downloaded OpenVPN configuration file (.ovpn) and click Save.
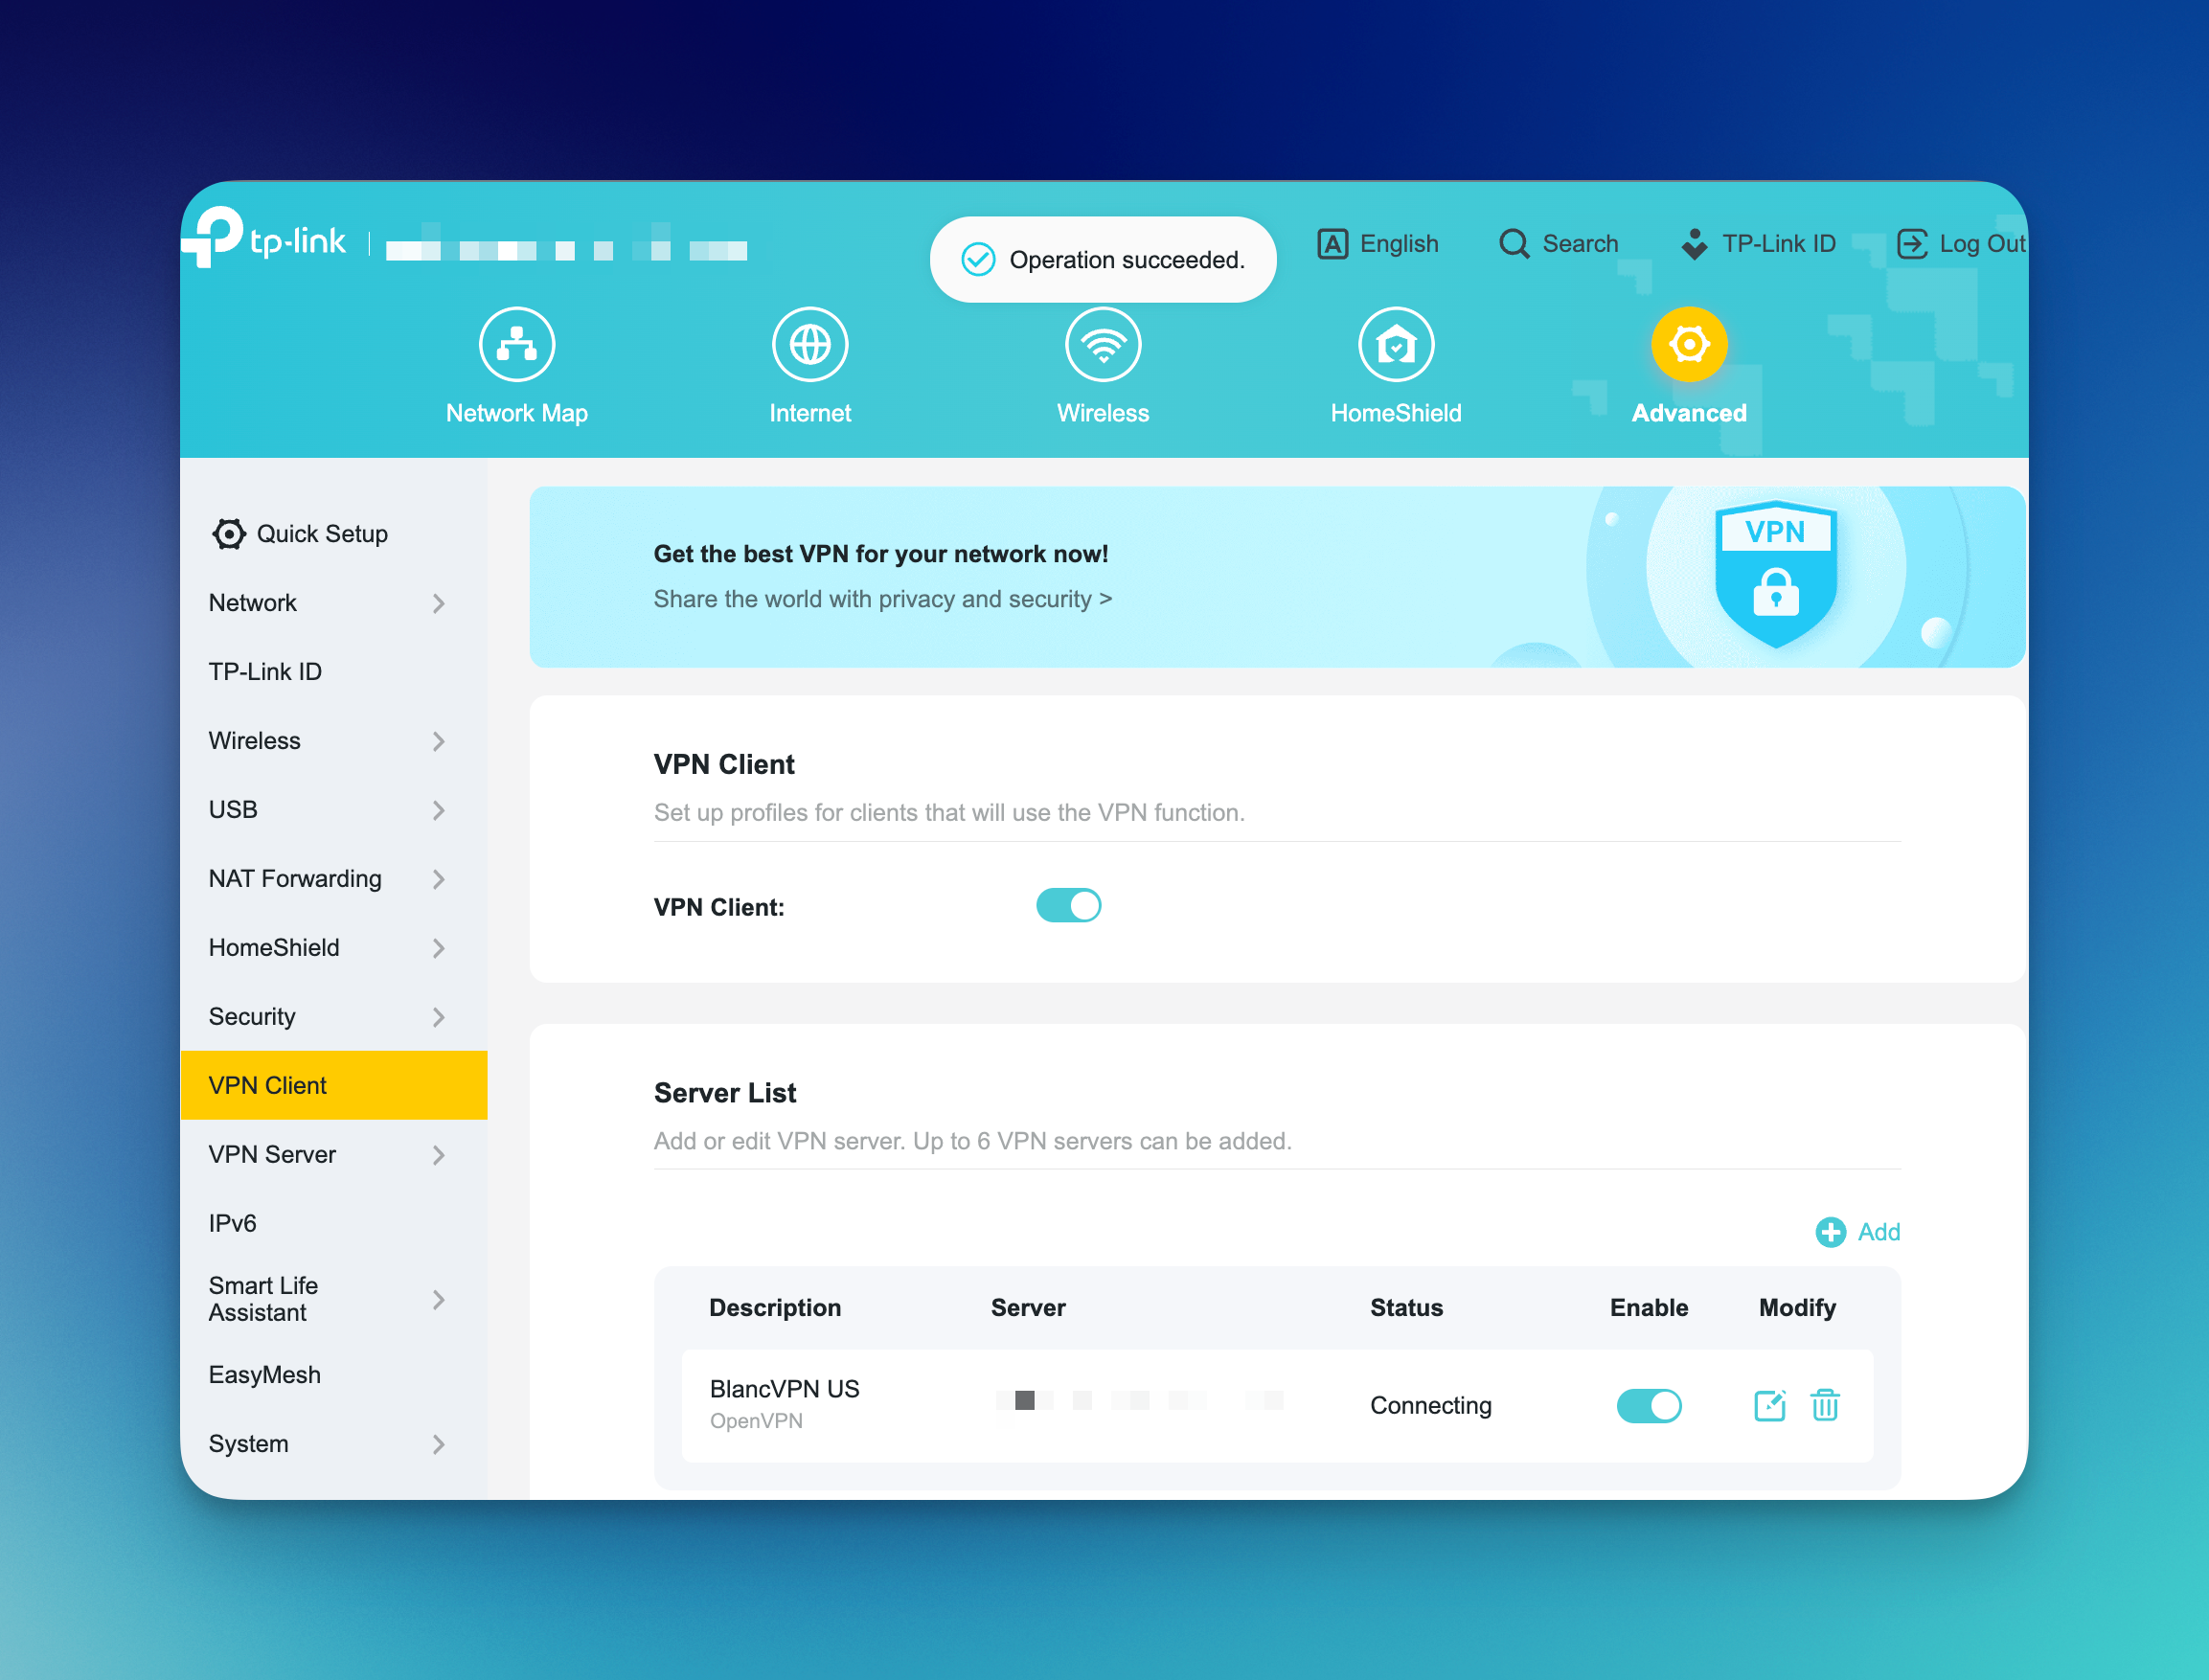
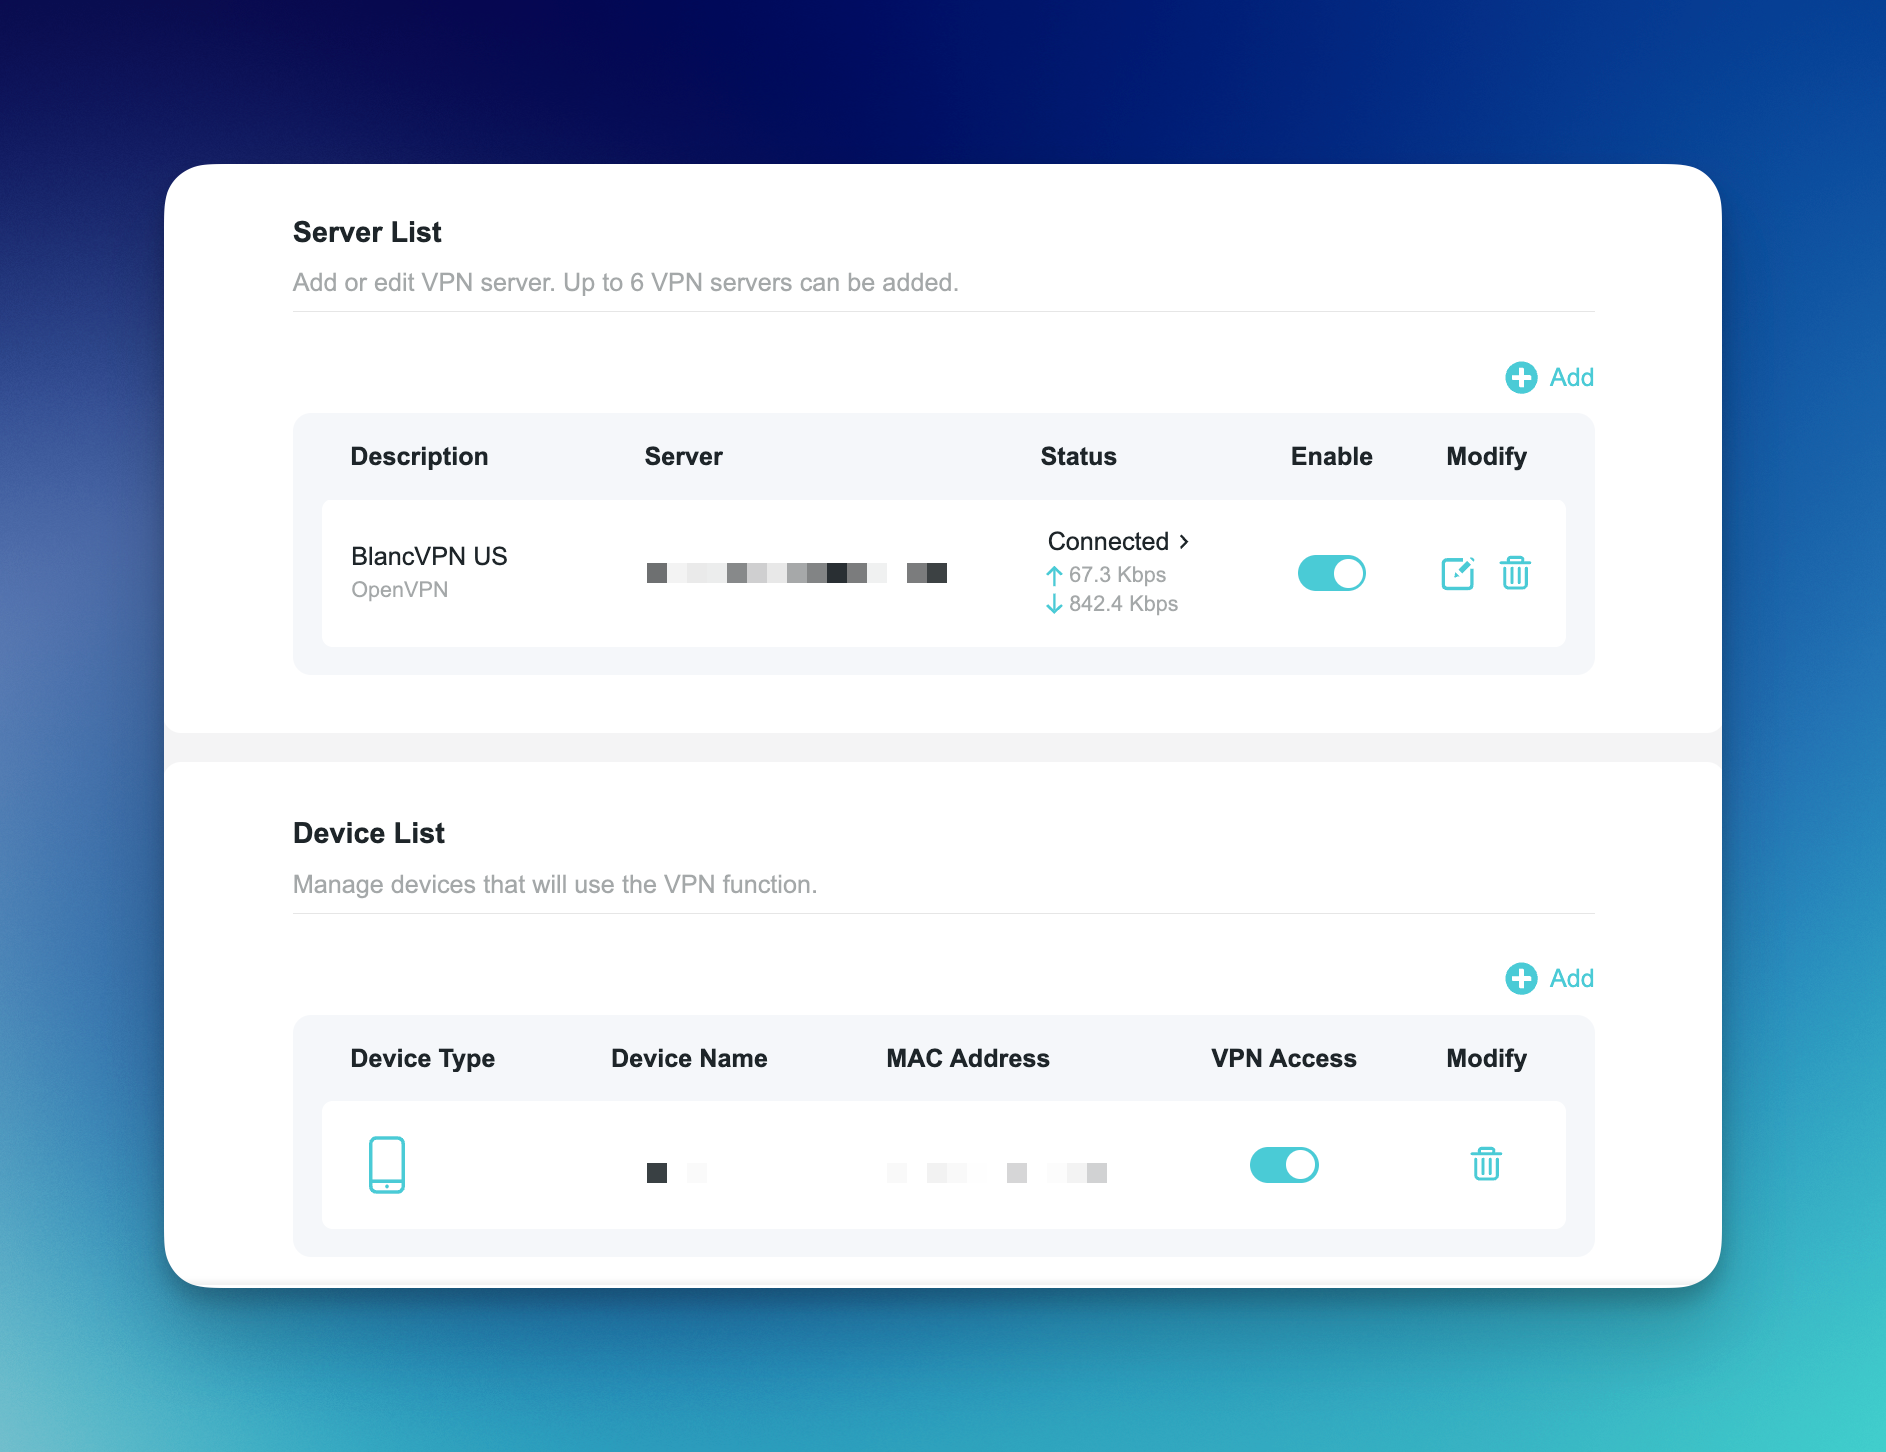
Activate the VPN using the toggle switch and save the changes.
Connecting devices to VPN
In the Connected Devices List section, click Add.
Check the devices you want to use the VPN.

Confirm your changes by clicking OK and Save.
Done! You are now connected to a fast and reliable VPN.
If you encounter any issues, feel free to contact our support team. We're here to help!
Additional settings
DNS Setup
We recommend changing the default DNS settings for better connection.
In the web configurator, go to Advanced → Network → Internet.
Expand the Advanced Settings tab.
Select Use the following DNS addresses:
Preferred DNS server:
1.1.1.1.Alternate DNS server:
1.0.0.1.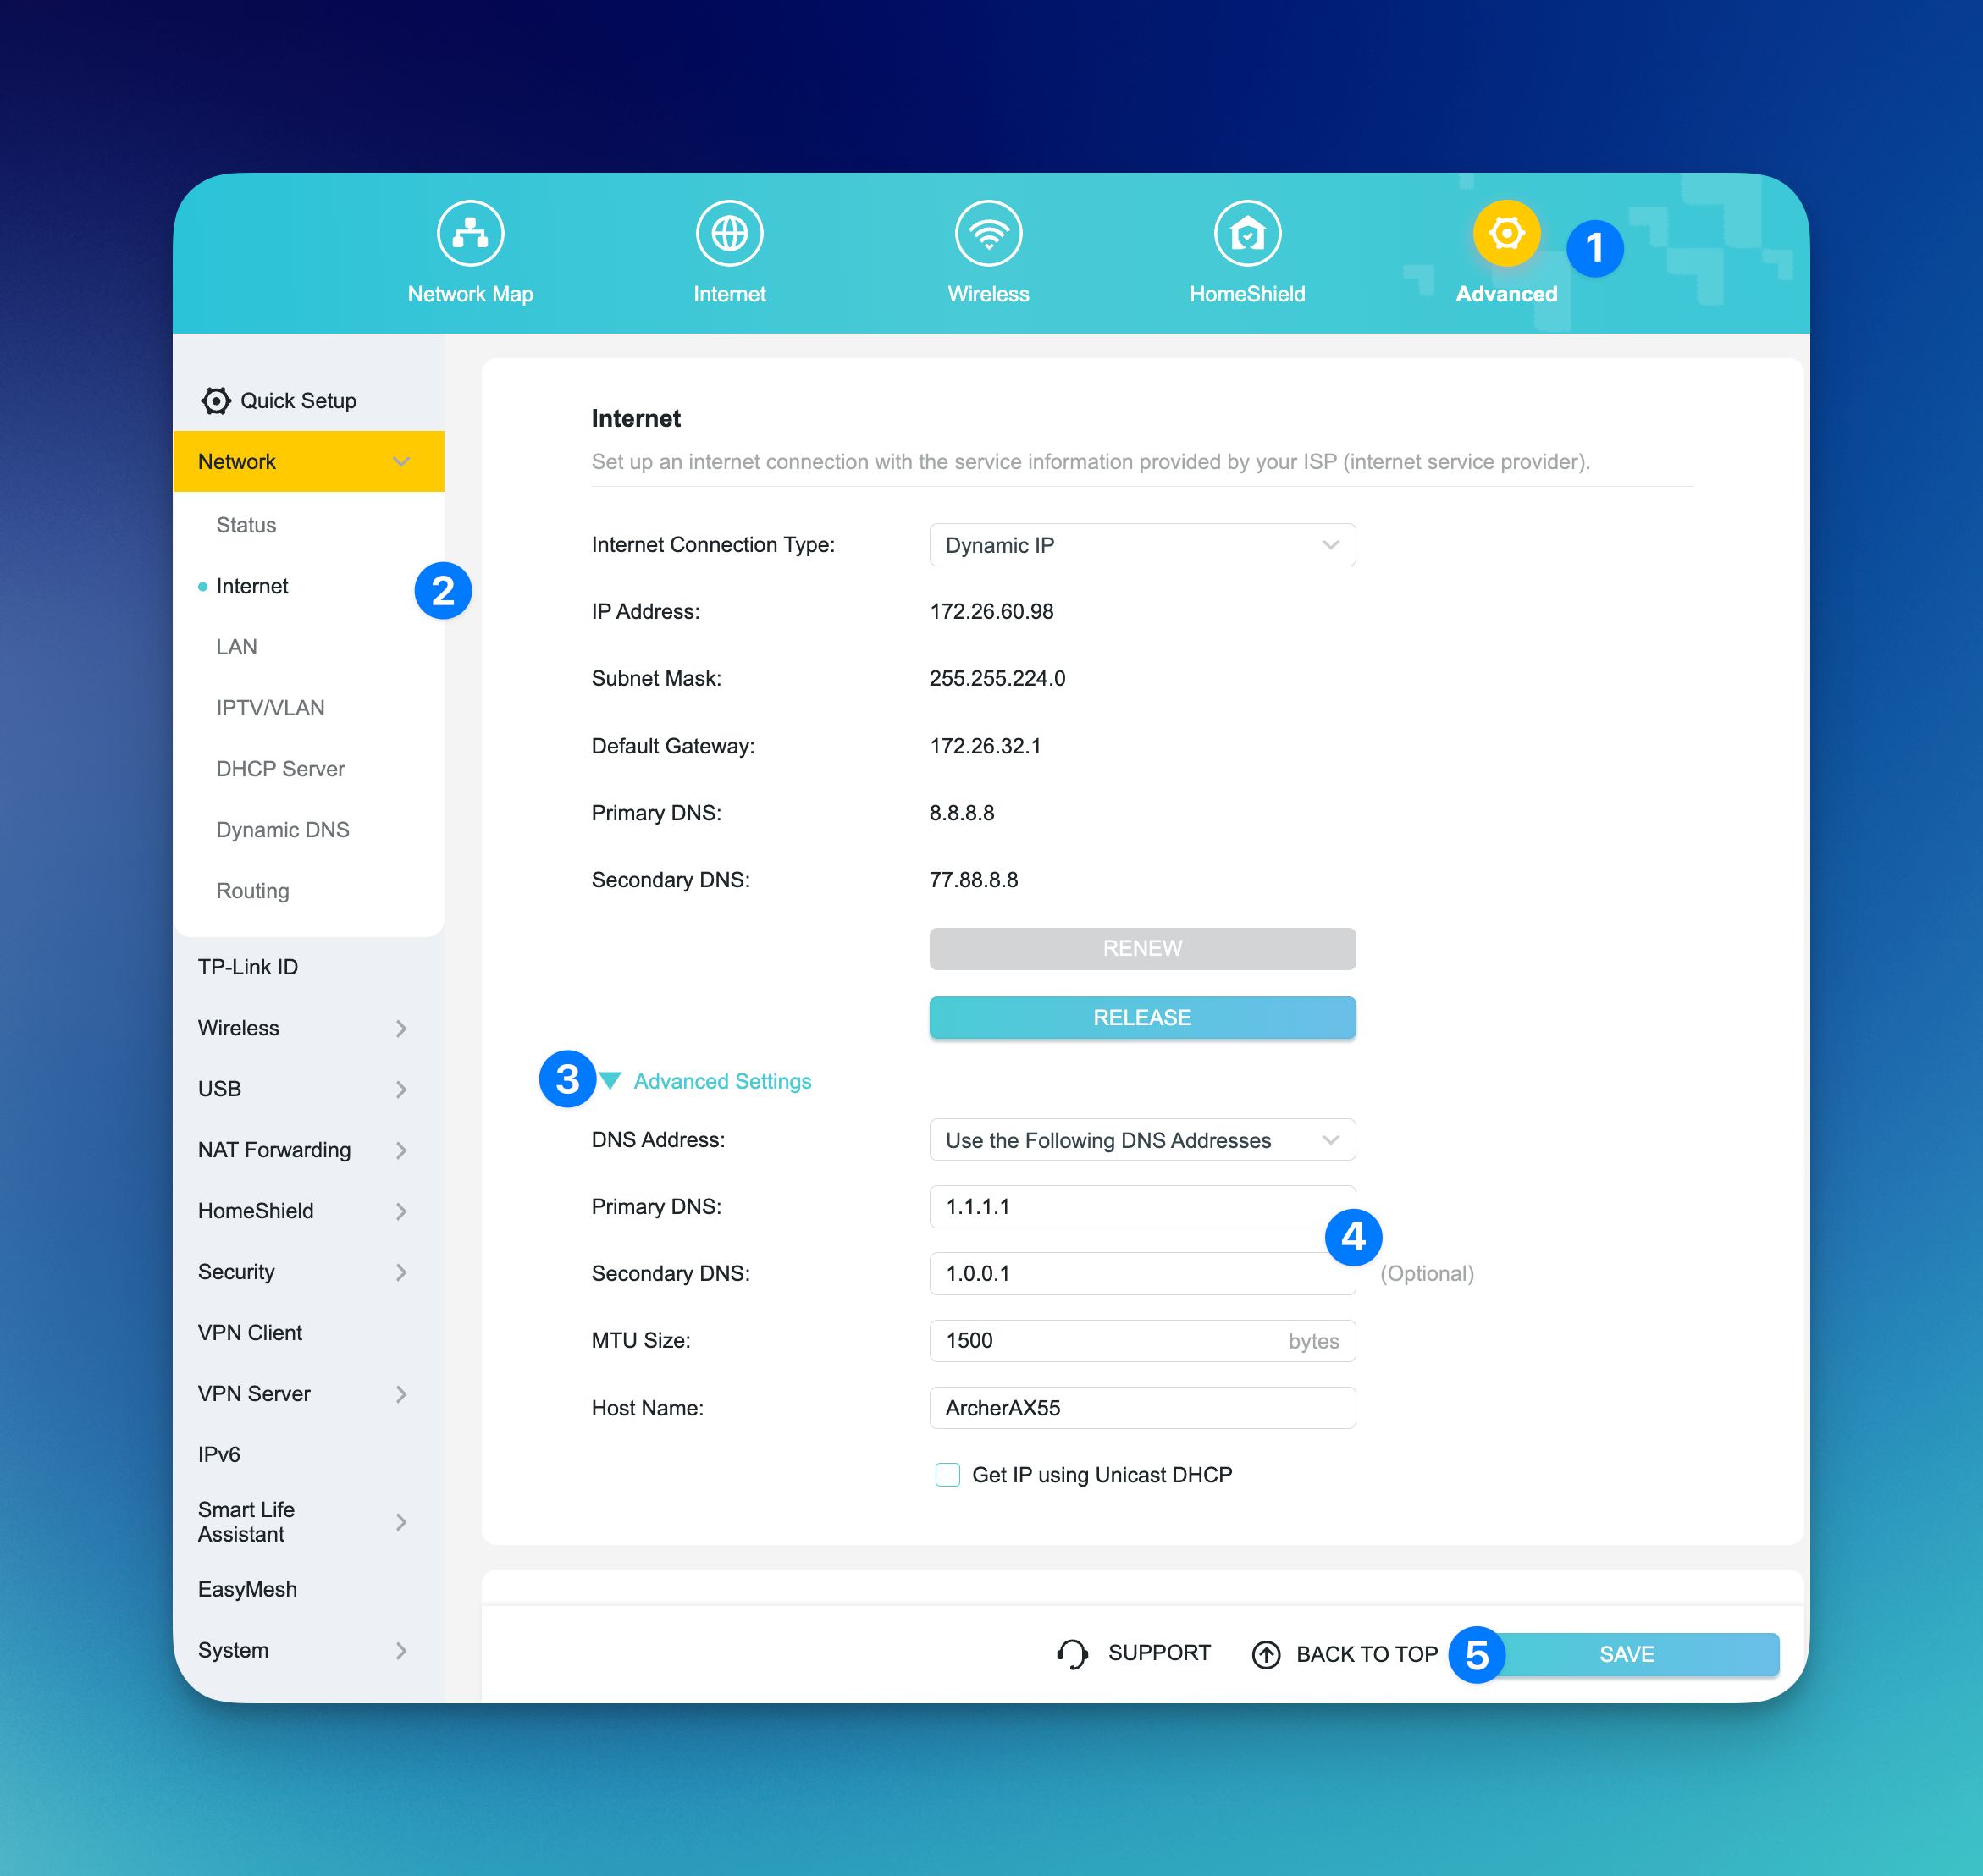
Save the changes and reboot your router.
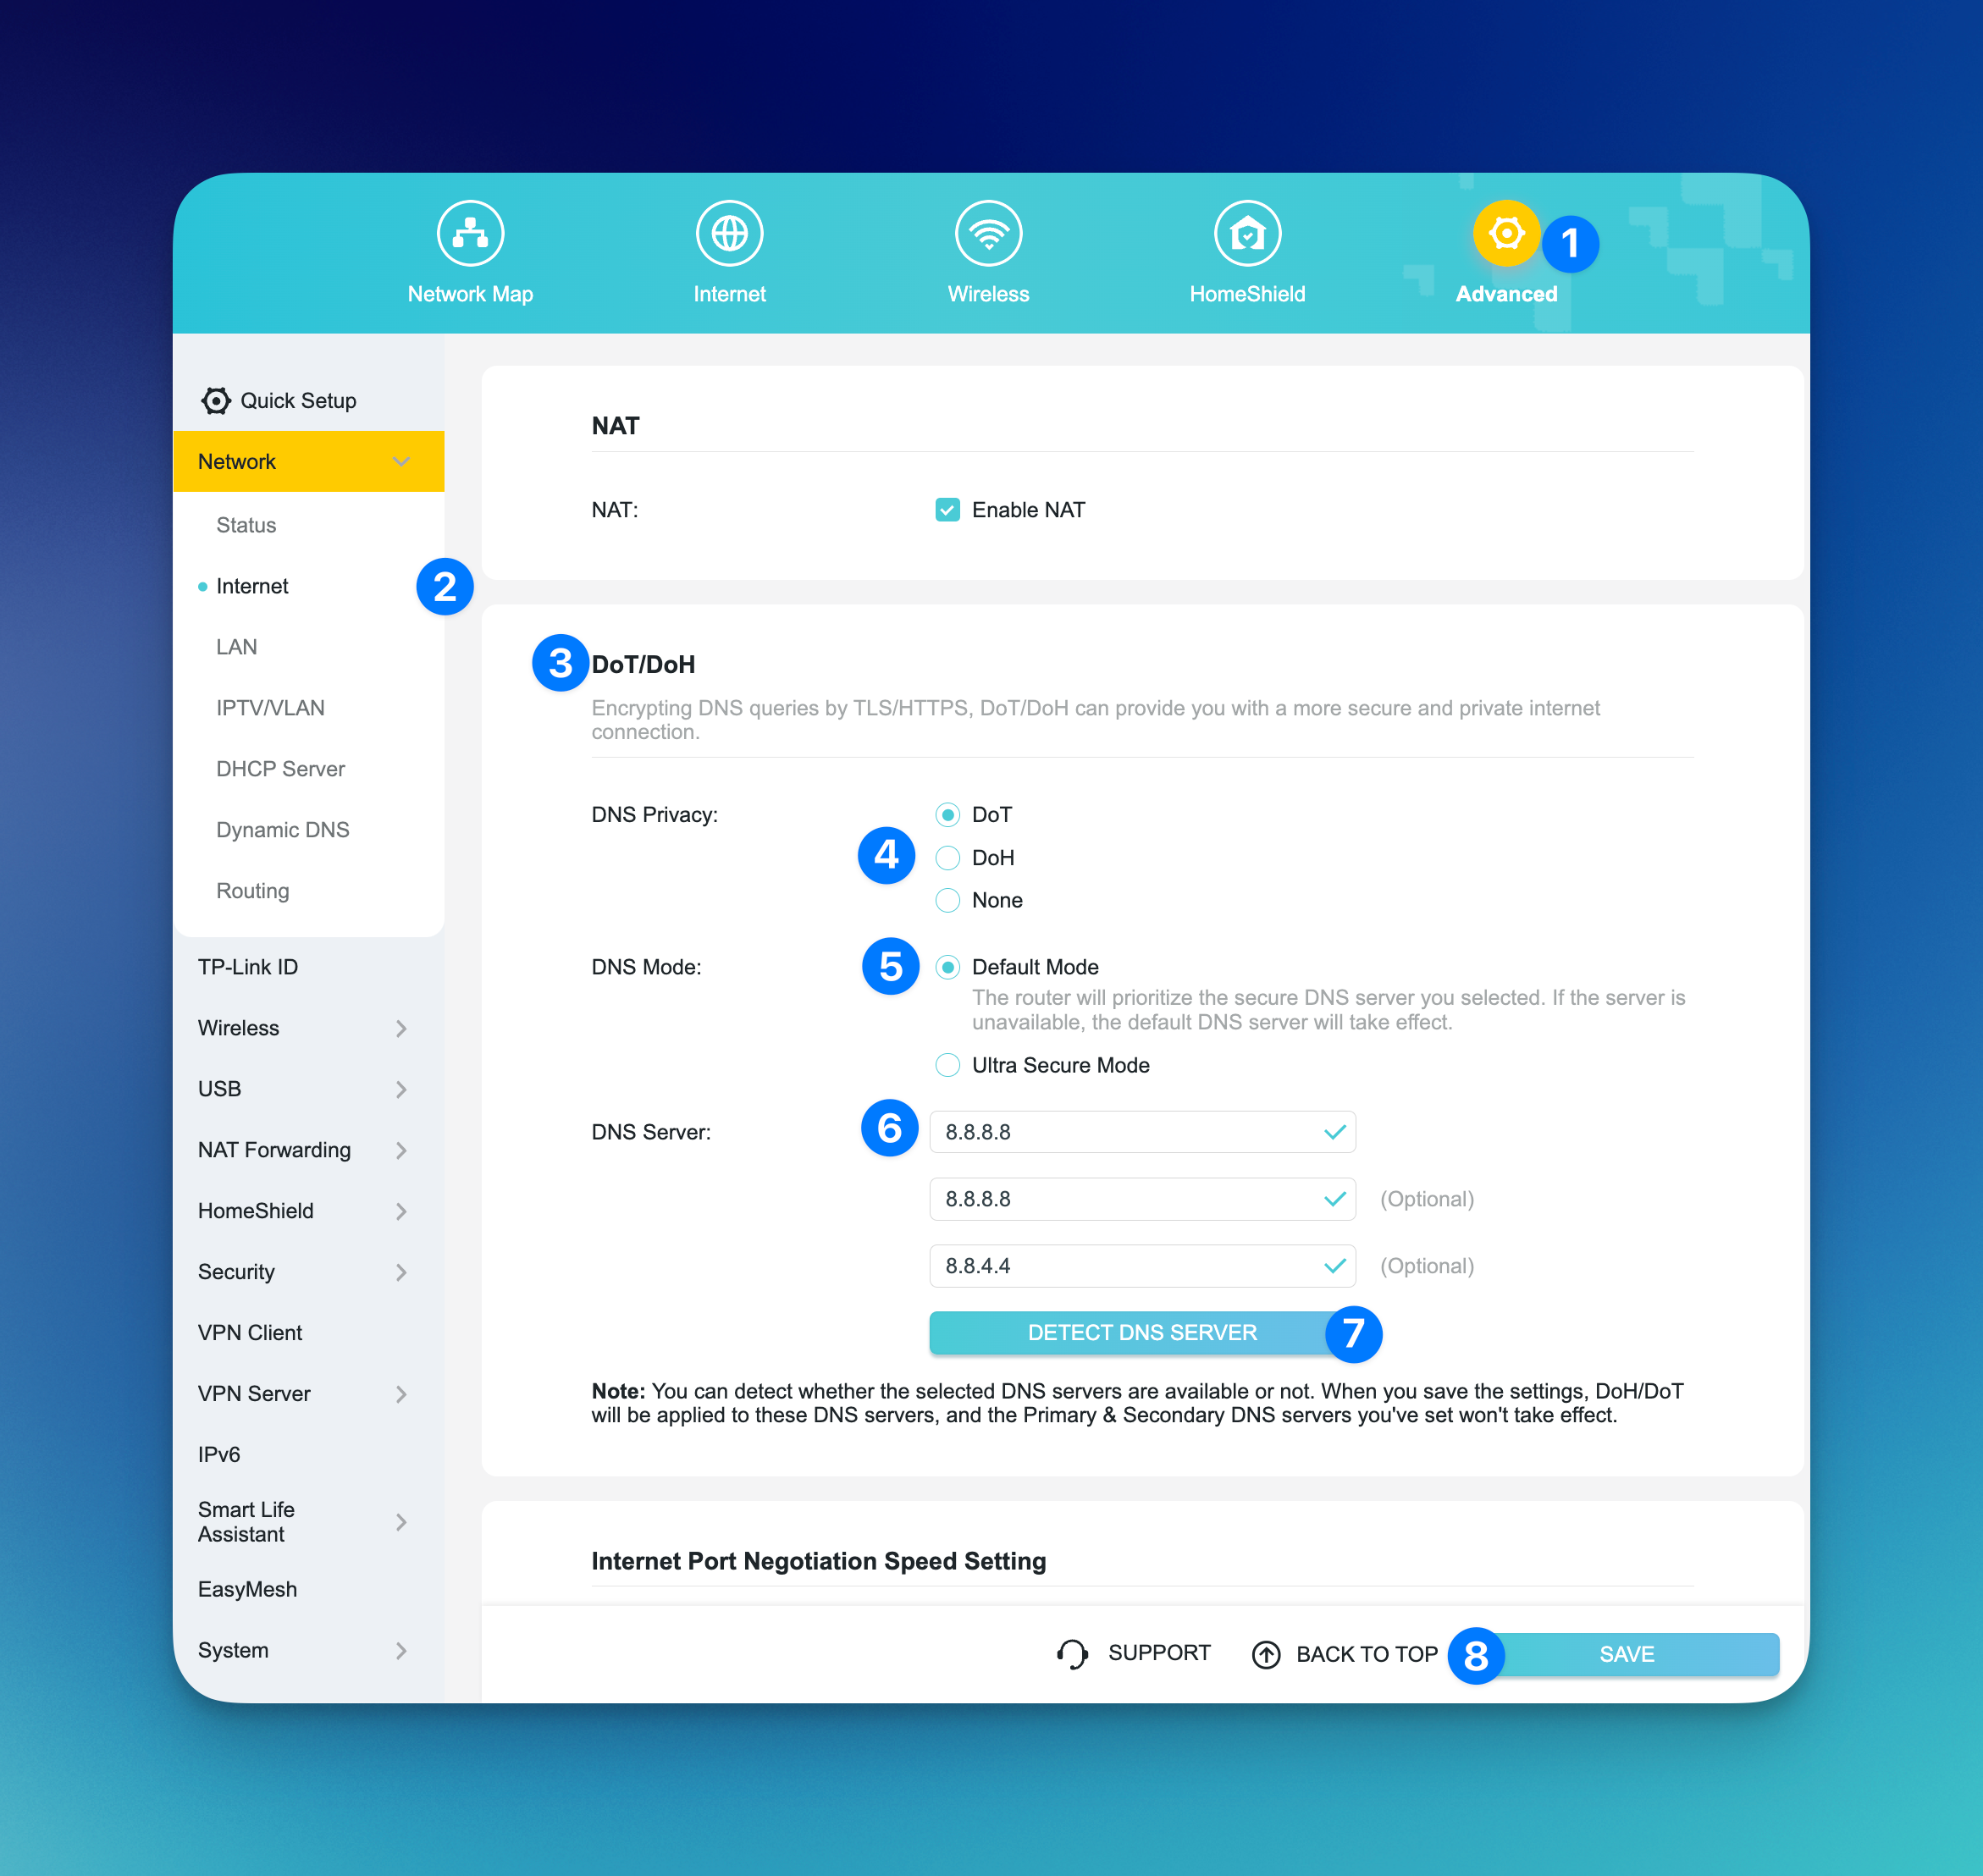
Configuring DoT/DoH
On the web configurator page, navigate to Advanced → Network → Internet → DoT/DoH.
Set DNS Privacy to DoT.
Choose Default Mode for DNS mode.
Enter the required DNS server details.
Click DNS Server Detection to check availability.
If the detection is successful, click Save.